Experimenting with Glass
In over thirty years of creative groundwork I repeatedly found that: children have a totally different approach to the material glass than adults. They are spontaneous and resourceful and find solutions where the planning and foresighted mind likes to despair.
Glass sculpting with children could become a long-term starting point for an interest in glass design. There are some museums that appear to have realised this and offer workshops where experienced glassblowers create pieces based on children‘s drawings. To this end they started the Kids-Design-Glass-Programme in 2004 at the Museum of Glass in Tacoma WA (USA). Month for month a child‘s drawing that had been chosen was submitted and then realised three dimensionally by experienced glass blowers. The happy combination of childlike fantasy with highly developed technical know-how led to both, a remarkable presentation in the museum, and to one of the most astonishing book publications I have come across in the last twenty years (*). Whether from this ambitious initiative future glass designers have emerged one hopes, indeed one would dearly love to know.
‚Glastüfteln‘ as is understood here means something else, something more fundamental. ‚Tüfteln‘ means trying it out for oneself. Being inquisitive. Seeing what manifests itself. Children appreciate it when one doesn‘t immediately stand in their way claiming superior knowledge. The term ‚Glastüfteln‘ came about when it was thought to give children their very first experience with the material glass. Why specifically with glass? Because it‘s exciting to see what glass can be like and what it‘s qualities are. Here it deals primarily with stimuli, not much else. It‘s not supposed to be about childlike ideas with help from experts as if it were to go over the top. It‘s much more about changes that a child can do itself

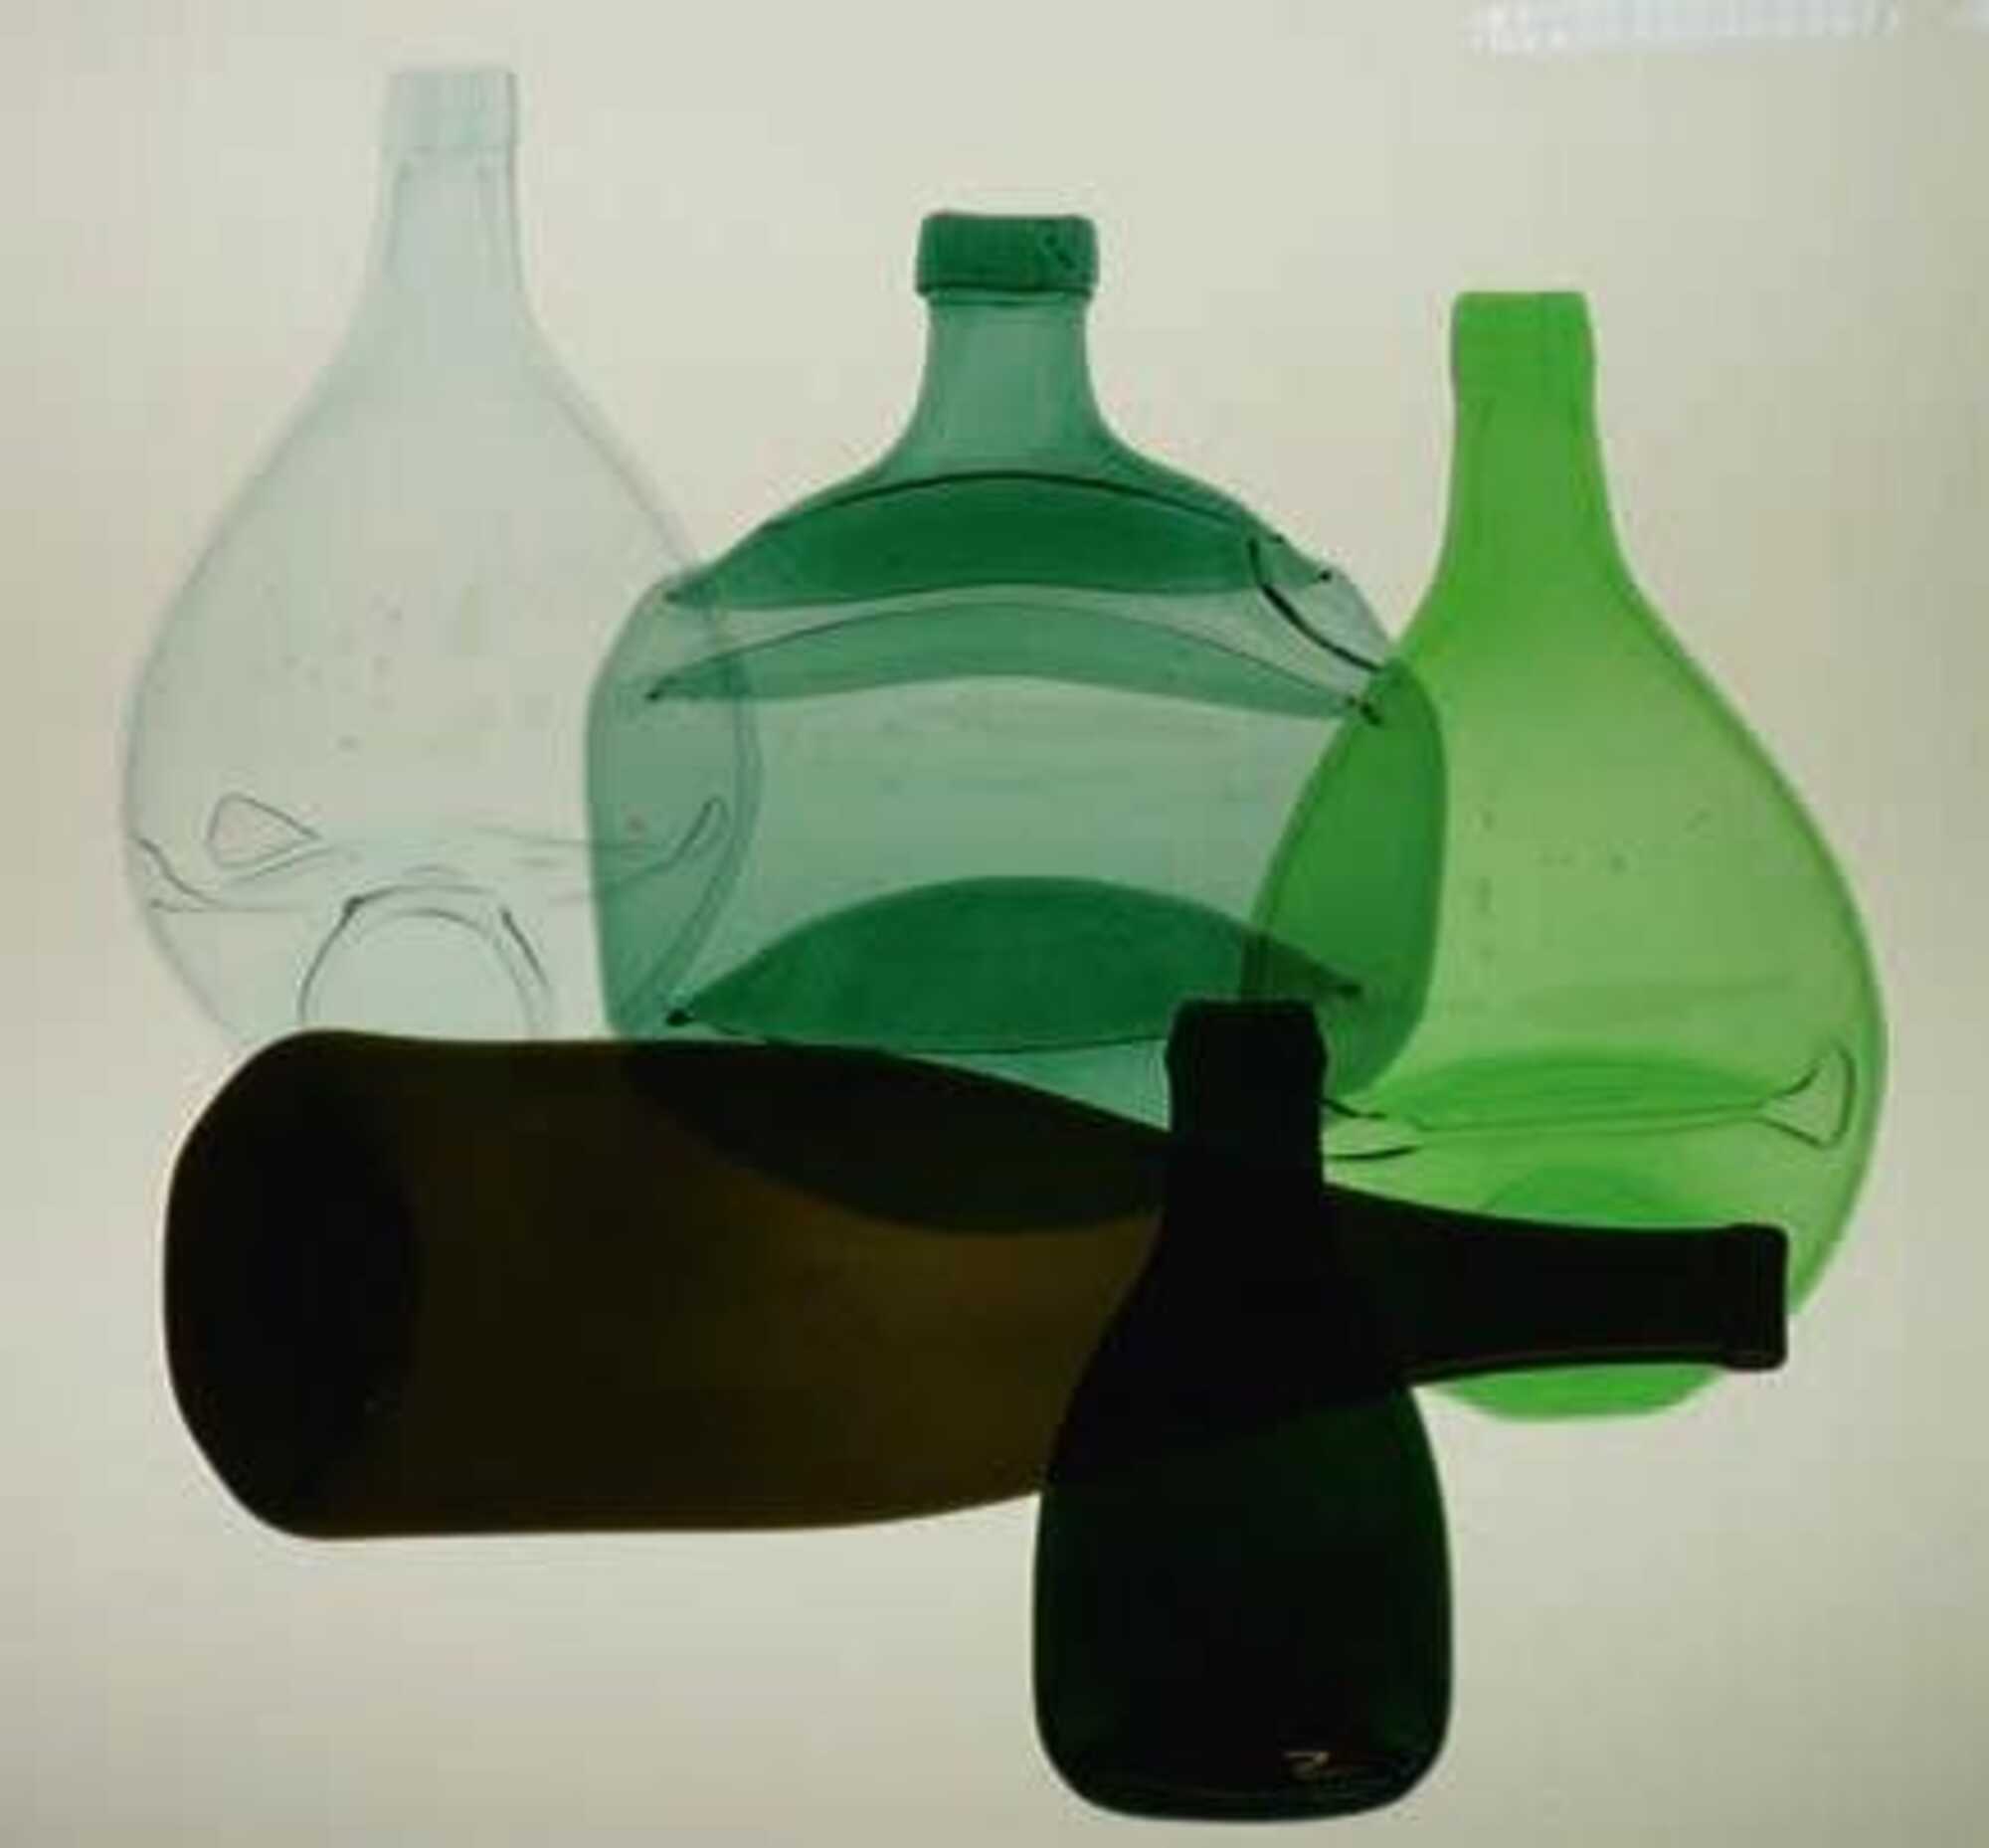
Bottle relief. Because of the different coefficients
of expansion of the glasses, the bottles were not
molten together, but rather connected with
each other through bonding technology.
Photo: Wolfgang Schmölders
The following hot or cold projects are ideal for children in primary school. A minimal amount of equipment, including glass pliers and safety goggles, is required. Should there be a ceramics kiln (with a clean kiln plate!) available it broadens the possibilities. Materials one can employ are used glass, glass fragments, plain and mirrored glass.
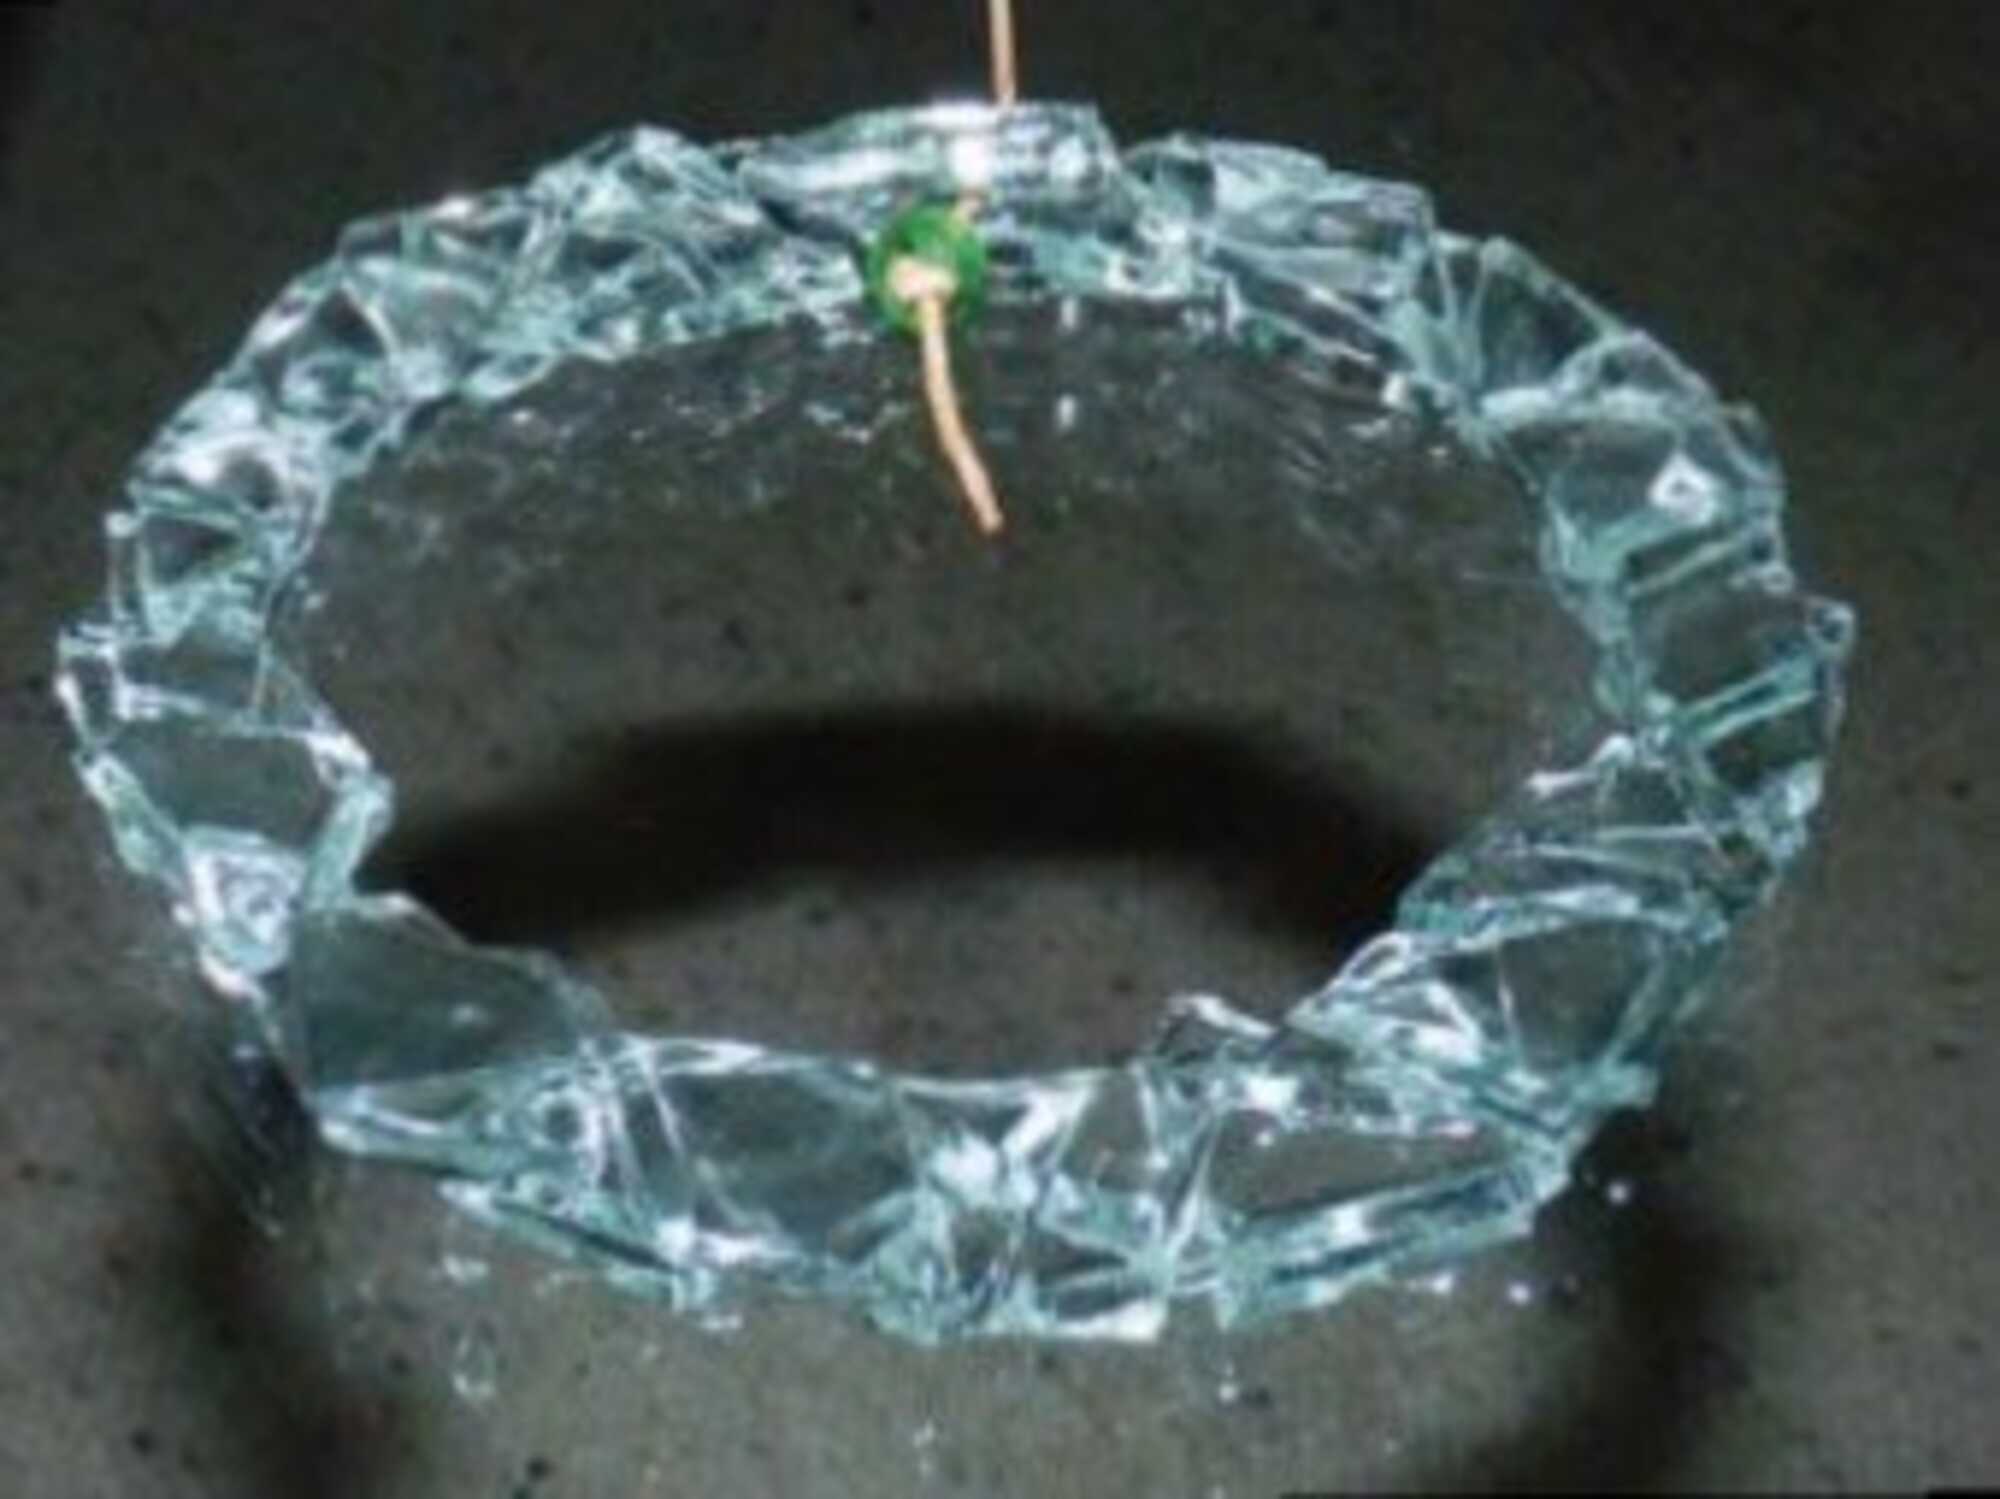
Bending bottles. ‚Once a bottle always a bottle‘ is meaningless here. Bottles can alter their shape in the ceramics kiln whether upright or lying down. Decisive is the choice of temperature (between 600 and 800°C) and the shelf primer (expensive but easy to handle and therefore it‘s worth recommending shelf paper).
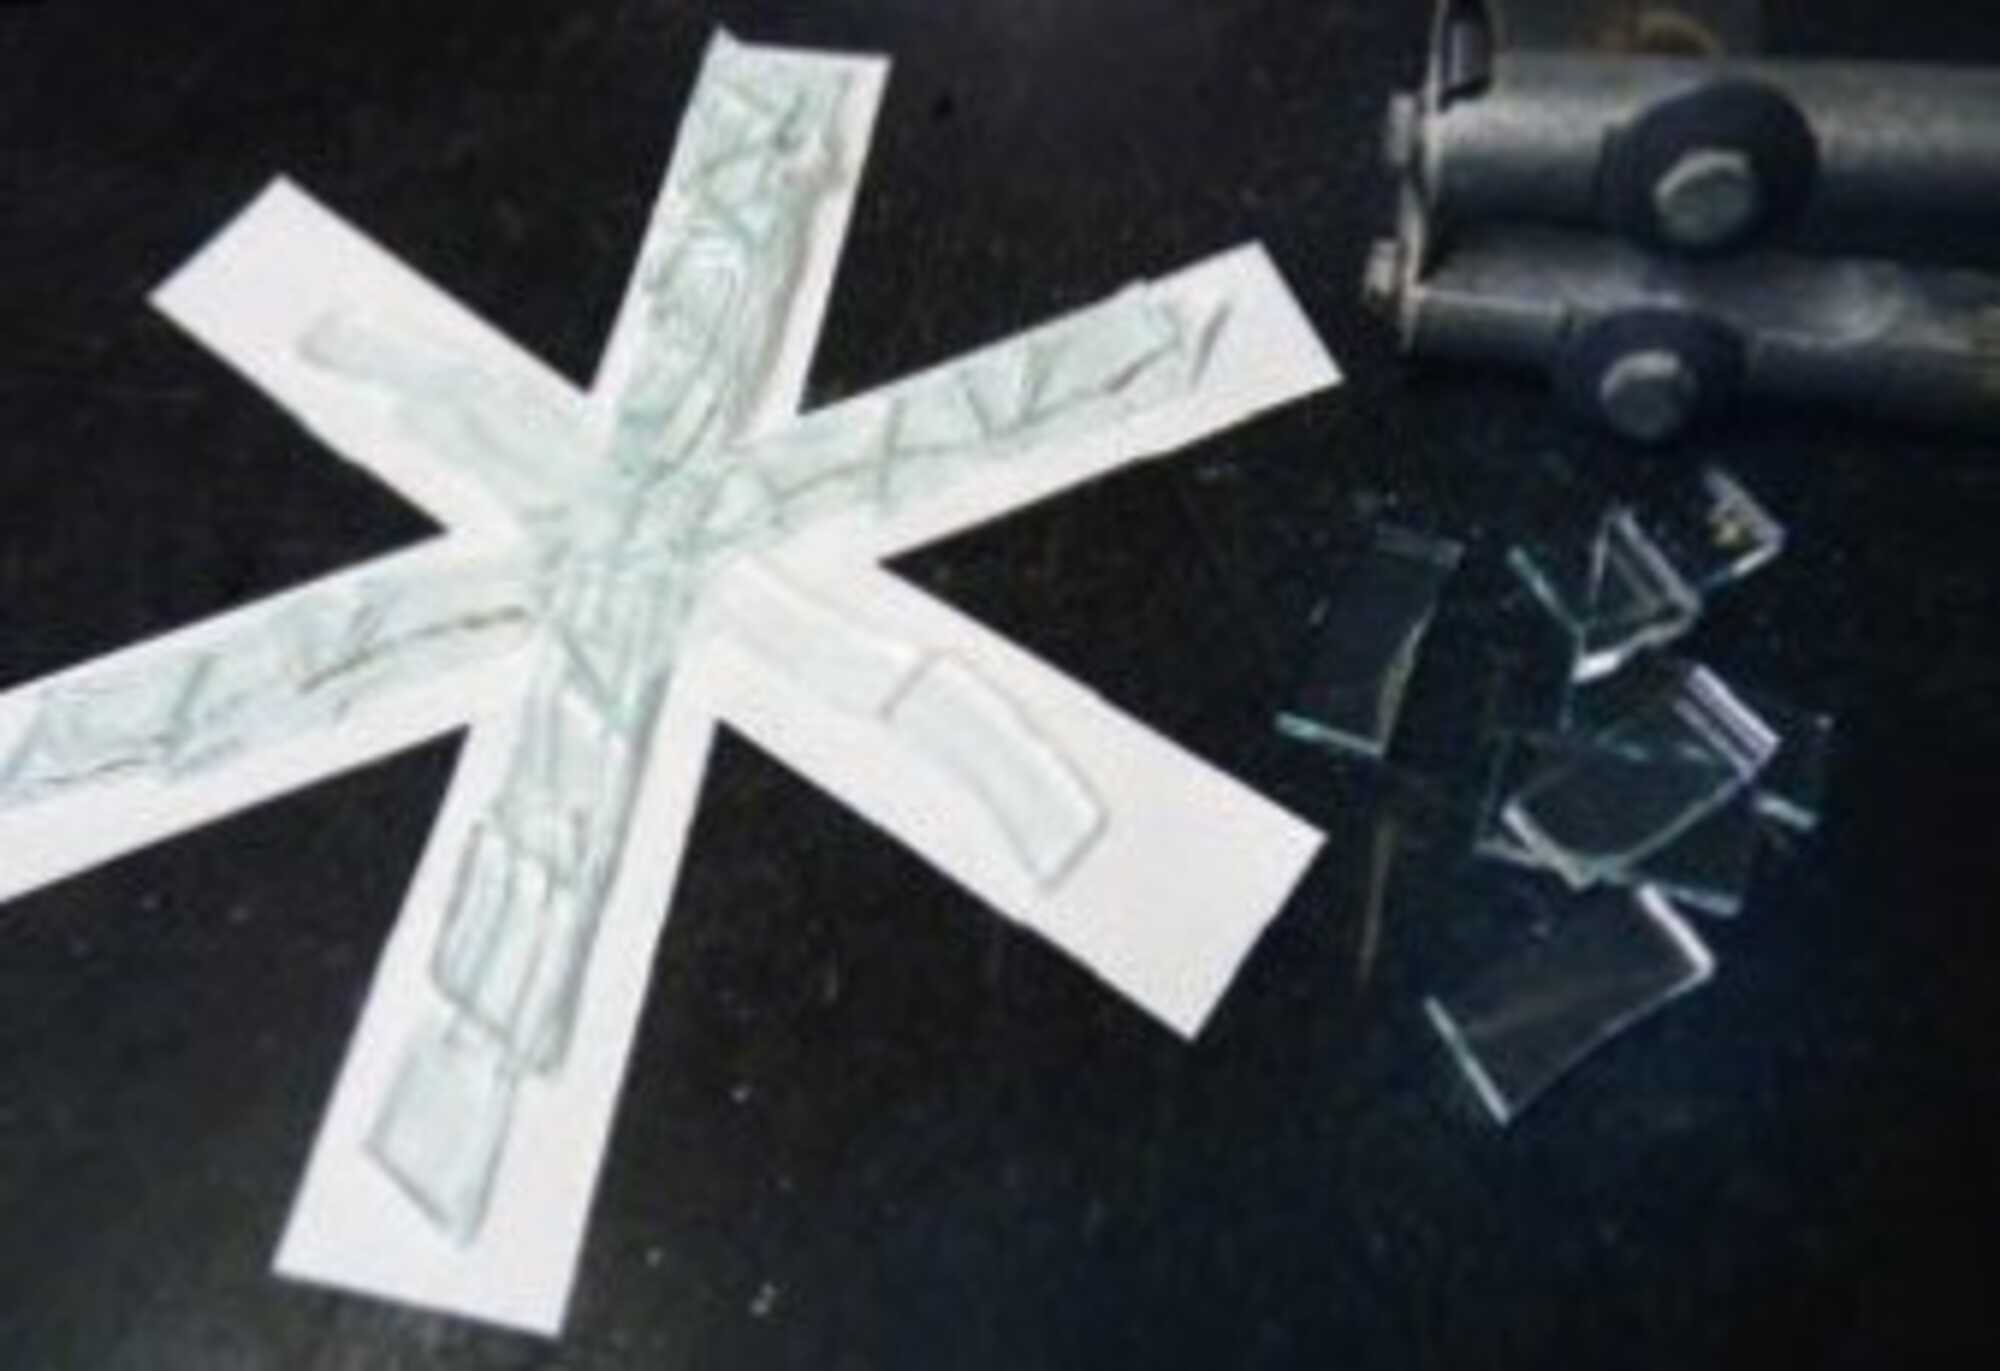
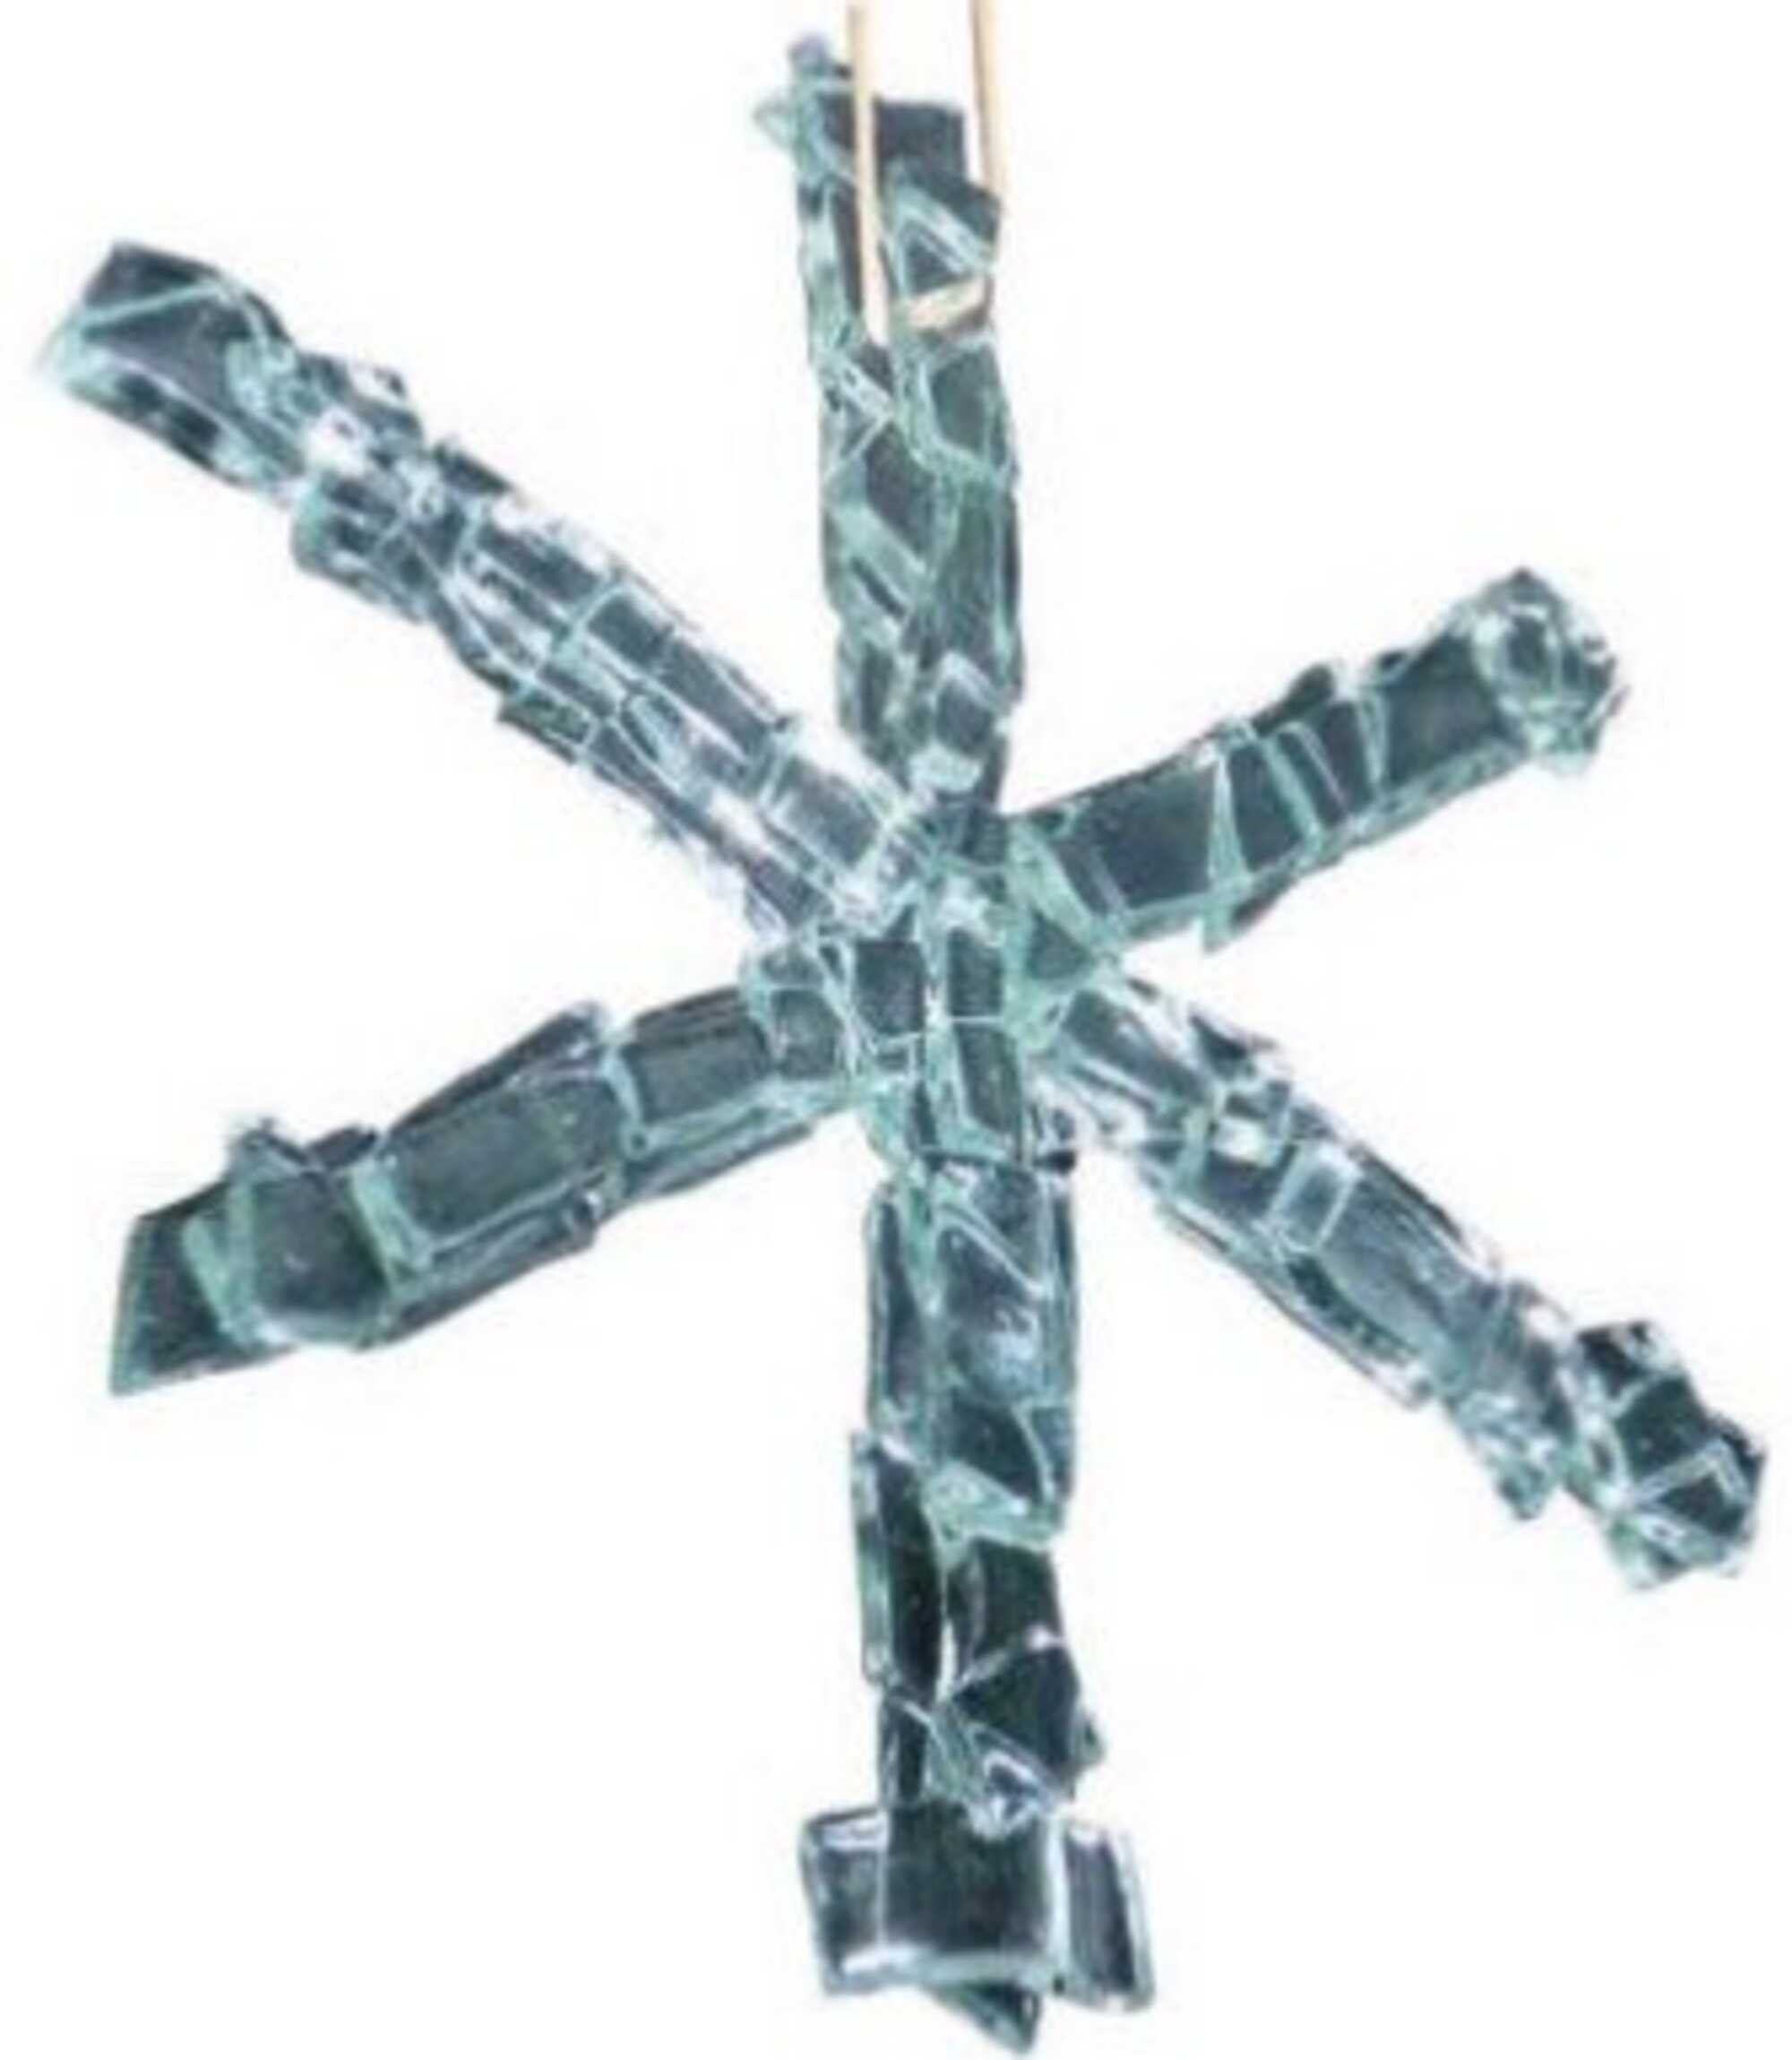
Glass stars. Cut the shelf paper into strips and glue each one on top of the other in star shapes. Small glass pieces are fixed onto the shelf paper with wallpaper paste. A second and third layer is glued down in such fashion as to avoid any gaps. No little corner of glass should jut out i.e. stick out beyond the shelf paper. Working on the separating paper simplifies carrying it to the ceramics kiln. Of course other shapes such as houses, animals etc. can be cut out of the separating shelf paper and covered with glass for fusing.
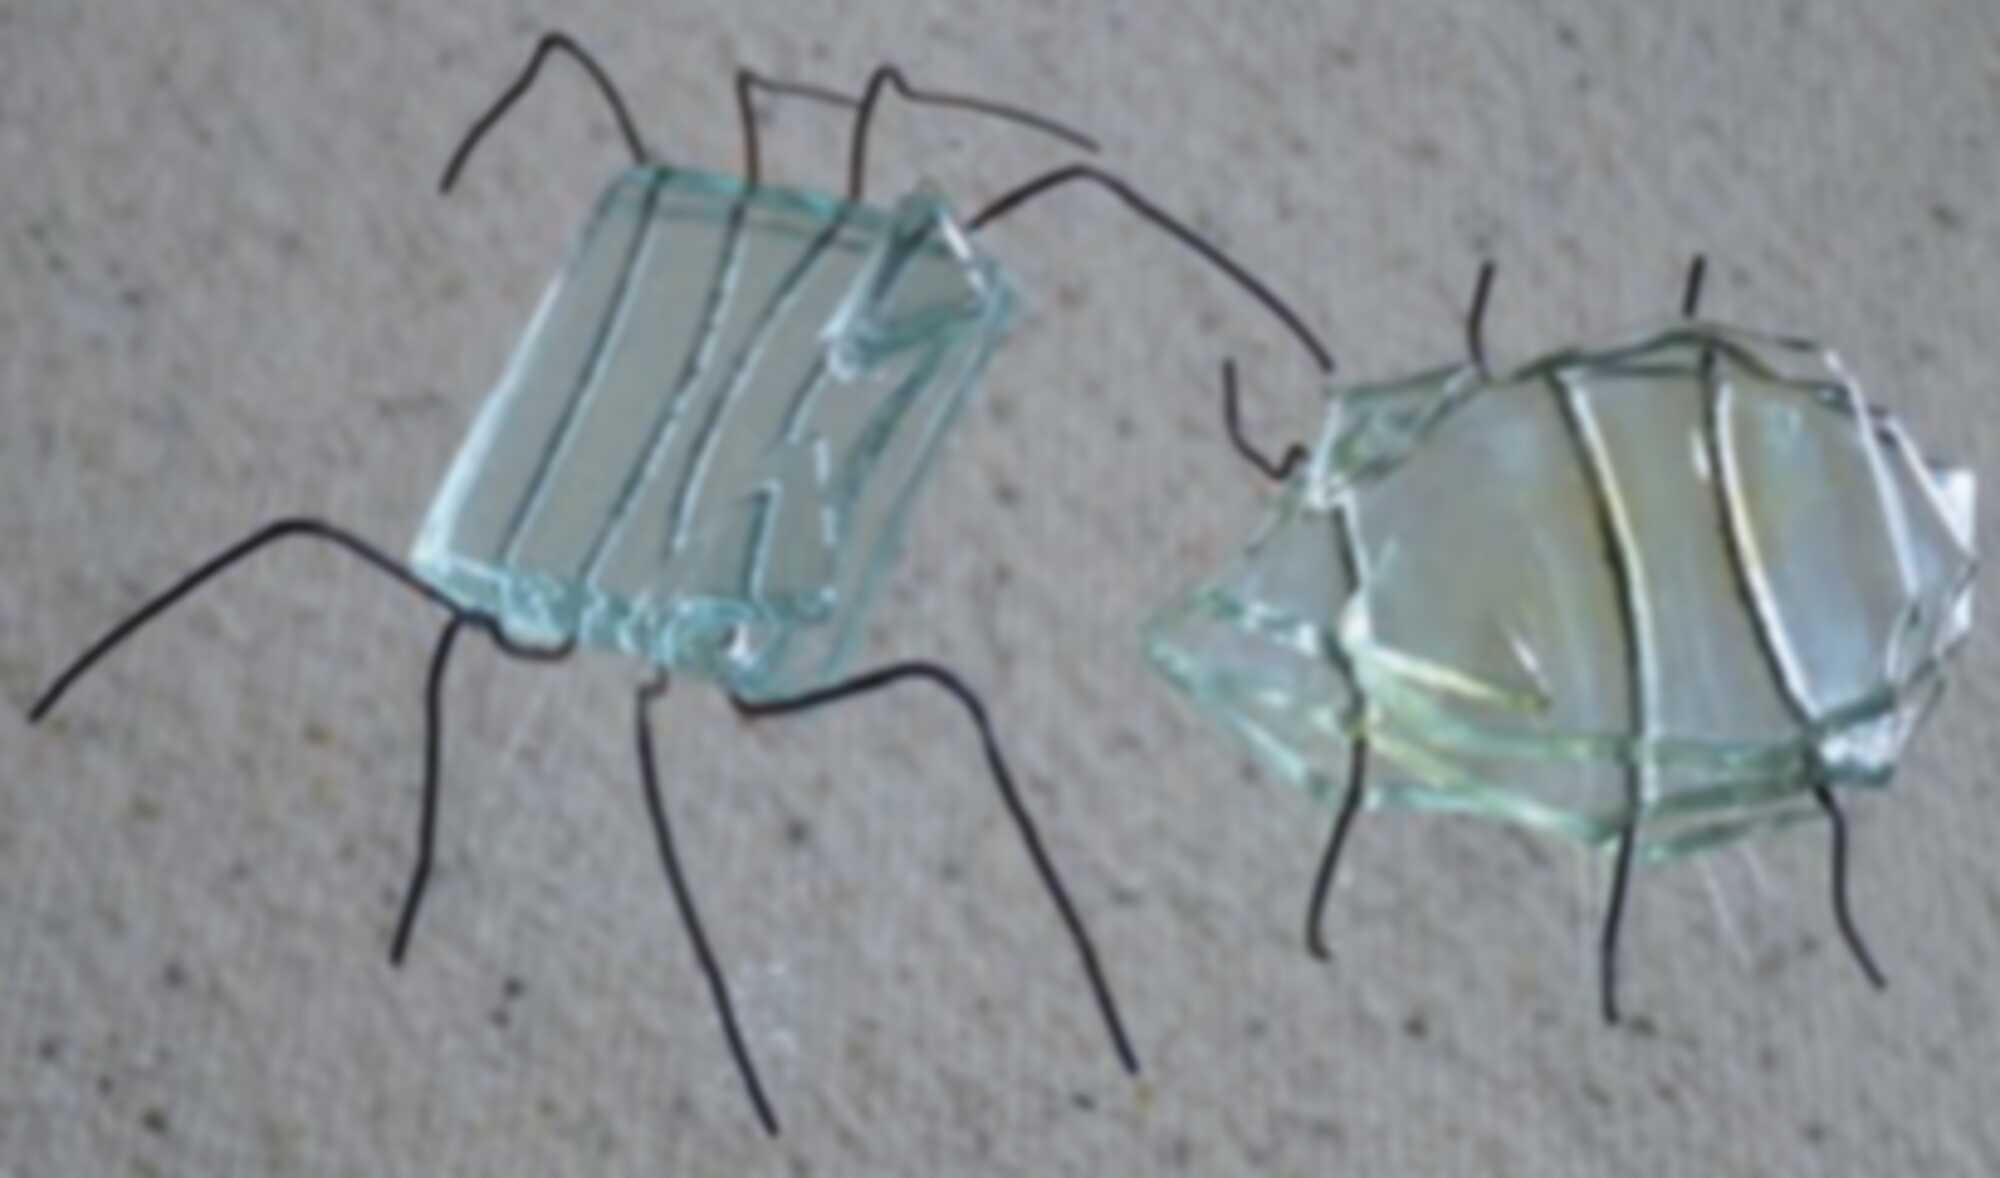
Beetles and spiders. Wires are fused between two or more glass pieces. The excess ends are bent into beetles and spider legs (beetles: 6 legs; spiders: 8 legs).
Painted glass. Painting with coloured glass powders onto glass. To hasten the drying time a hair dryer can be used. Fusing it with the painted side down results in layered glass. Take care with larger formats (from ca. 10 x 10 cm): fusing problems can arise when using a ceramics kiln.
(*) Kids Design Glass, Hg. Museum of Glass, Tacoma WA, 2009. 132 pages, with comic and CD. ISBN 978-0-295-98937-2. The comparisons of the children's drawings and the glass objects are unfortunately without size specifications. (Vgl. GH 4/09, 23)
Author: Wolfgang Schmölders
The article is published in the context of our cooperation with GLASHAUS - International Magazine for Studio Glass 1/2020.
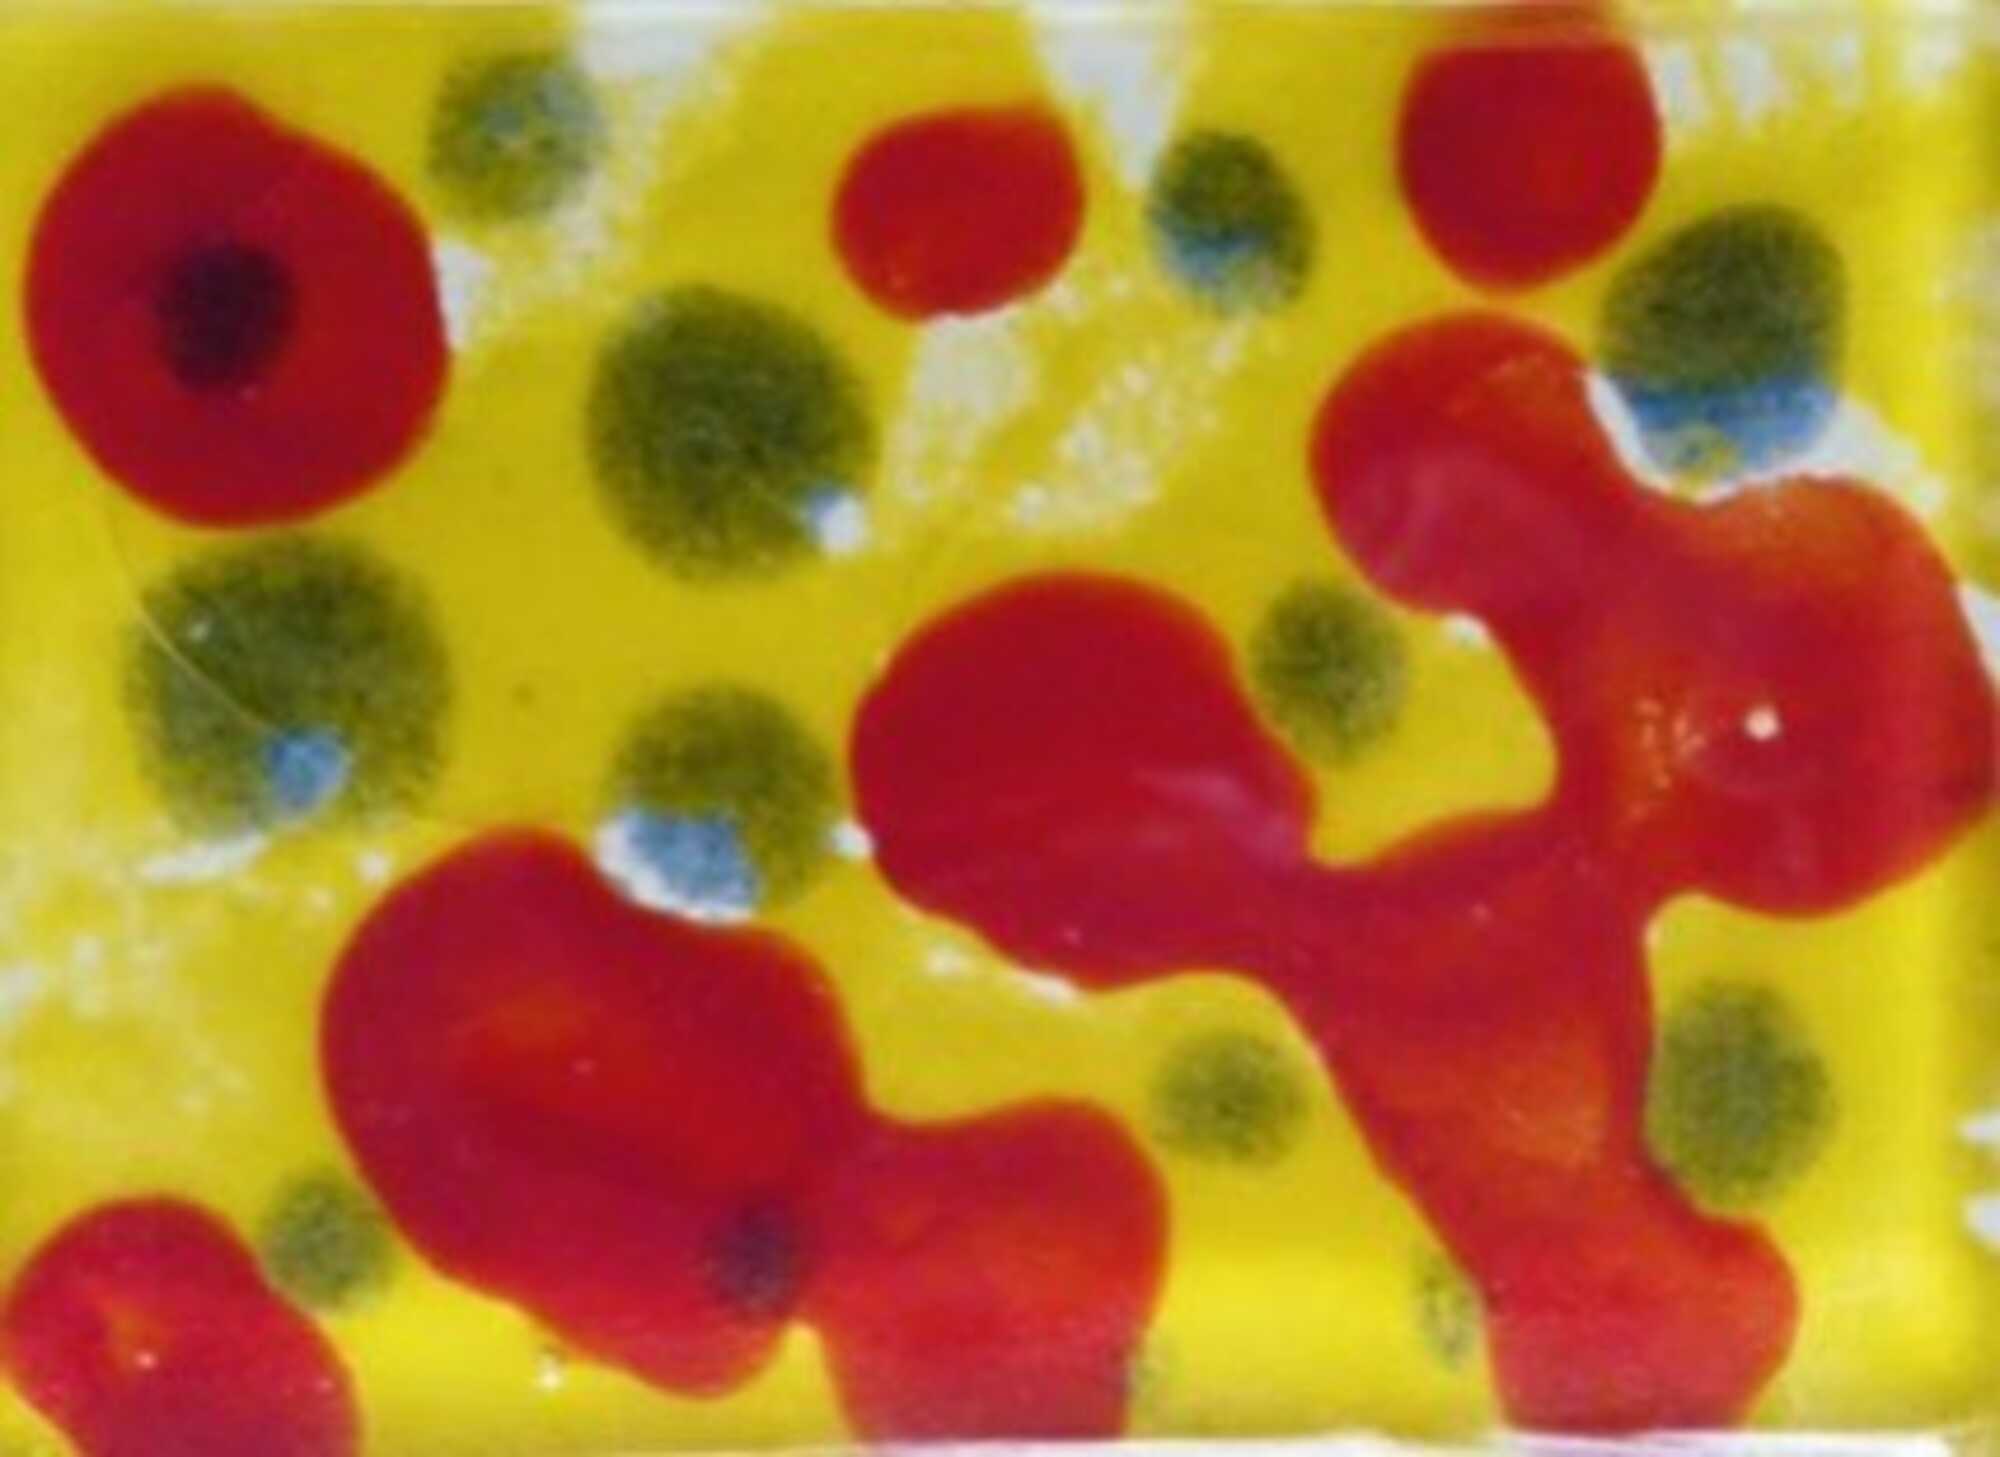
Cover picture: stained glass composition with overlay. (Photo: Wolfgang Schmölders)
Cover picture: stained glass composition with overlay. (Photo: Wolfgang Schmölders)